

In this guide, we’ll set up a Debian server running Nextcloud, a popular self-hosted cloud storage platform, on a LAMP stack. It assumes you’re starting from a freshly updated Debian install with an SSH server already running, and by the end you’ll have a working Nextcloud instance you can log in to and, optionally, point at a separate data drive.
Step 1: Install sudo
Debian doesn’t always come with sudo set up for your user. Become root, install it, and add your user (called user in this example) to the sudo group:
su -
apt install sudo
gpasswd -a user sudo
Log out and back in for the group change to take effect. Alternatively, you can grant access directly by running visudo and adding a line for your user at the end of the file:
username ALL=(ALL:ALL) ALLStep 2: Update the System
Bring the system fully up to date before installing anything:
sudo apt update
sudo apt upgrade
Step 3: Install the Required Packages
Install Apache, MariaDB, and all the PHP modules Nextcloud needs, along with certbot in case you want to add HTTPS later, in one go:
sudo apt install apache2 mariadb-server mariadb-client libapache2-mod-php \
  php-gd php-json php-mysql php-curl php-mbstring php-intl php-imagick \
  php-xml php-zip php-bcmath php-gmp certbot
Step 4: Secure MariaDB and Prepare Apache
Run the MariaDB hardening script and follow the prompts to set a root password, remove the anonymous users, disallow remote root login, and drop the test database:
sudo mysql_secure_installation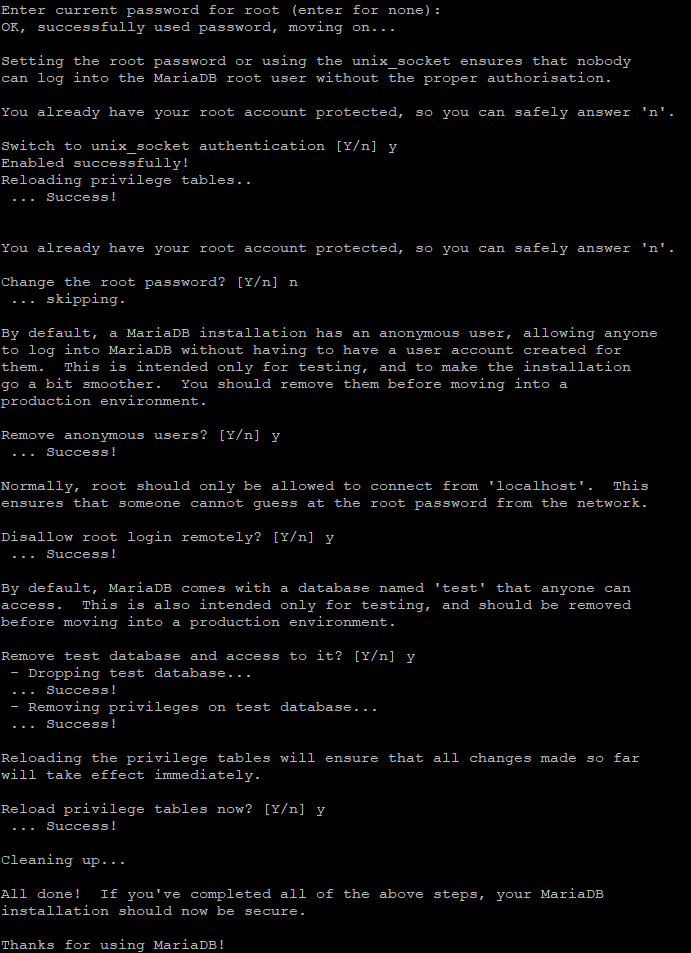
Then create an Apache site config for Nextcloud by copying the default one as a starting point:
sudo cp /etc/apache2/sites-available/000-default.conf /etc/apache2/sites-available/nextcloud.confStep 5: Create the Nextcloud Database
Log in to MariaDB as root:
sudo mysql -u root -pThen create a user and database for Nextcloud, choosing your own strong password in place of the placeholder:
CREATE USER 'nextcloud'@'localhost' IDENTIFIED BY 'ChangeThisPassword';
CREATE DATABASE nextcloud;
GRANT ALL PRIVILEGES ON nextcloud.* TO 'nextcloud'@'localhost';
FLUSH PRIVILEGES;
QUIT;
Step 6: Download Nextcloud
Move into the web root, download and unzip the latest Nextcloud release, and set the ownership and permissions so Apache can manage the files:
cd /var/www/html/
sudo apt -y install wget unzip
sudo wget https://download.nextcloud.com/server/releases/latest.zip
sudo unzip latest.zip
sudo chown -R www-data:www-data /var/www/html
sudo chmod -R 755 /var/www/html
Then restart Apache so it picks everything up:
sudo systemctl restart apache2Step 7: Set Up Separate Data Storage (Optional)
I personally prefer to keep the Nextcloud data on a separate drive, since it keeps my files apart from the operating system and makes them easier to manage. If you’re happy with the default location, feel free to skip this step.
Mount your data drive and add an entry to /etc/fstab so it mounts automatically at boot. In the commands below, sdxx stands in for your actual device, which will be different on your machine, so check carefully with lsblk before running anything destructive. First mount it and grab its UUID:
sudo mkdir /mnt/x
sudo mount /dev/sdxx /mnt/x
sudo blkid /dev/sdxx
Then open fstab and add an entry using the UUID you just noted:
sudo nano /etc/fstabUUID=xxxxxxxx /mnt/x ext4 defaults 0 0To test the fstab entry, unmount the drive and then remount everything from fstab. If mount -a completes without errors and lsblk shows the drive mounted at /mnt/x, your entry is correct:
sudo umount /dev/sdxx
sudo mount -a
sudo lsblk
Finally, give the web server ownership of the data location so Nextcloud can write to it:
sudo chown -R www-data:www-data /mnt/x
sudo chmod -R 755 /mnt/x
Step 8: Run the Nextcloud Setup Wizard
Open your server’s IP address in a browser to reach the Nextcloud setup page, create your admin account, and fill in the database details you created earlier. If it asks for a data directory and you set up a separate drive in the previous step, point it there now, otherwise don’t worry, since it can be changed manually later.
- Database User:
nextcloud - Database Password: the password you set earlier
- Database Name:
nextcloud - Database Host:
localhost
Step 9: Set Up Cron for Background Jobs
By default Nextcloud runs its background tasks via AJAX, which is adequate for a single user but not especially reliable. Using cron instead is the preferred approach, so here we’ll create a crontab for the web server user and then switch Nextcloud over to it.
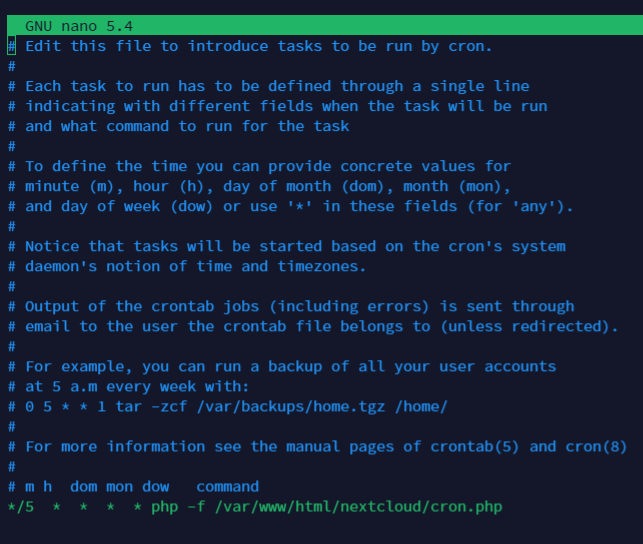
Create a crontab for the www-data user, which is the web server user on a Debian LAMP stack:
sudo crontab -u www-data -eIf it asks which editor to use, nano is the easier one to start with. Add the following line below the existing comments, making sure the path matches your own Nextcloud installation:
*/5 * * * * php -f /var/www/html/nextcloud/cron.phpThen, in the Nextcloud admin settings under Basic Settings, select Cron as the background job method. The job runs every 5 minutes, so give it time to run before troubleshooting.
Step 10: Move the Data Folder Later (Optional)
If you didn’t point Nextcloud at your separate drive during setup but want to move the data folder afterwards, you can do it by hand. First sync the existing data across to the new location. The --exclude flag lets you skip anything you don’t want to copy, so change or remove it as needed, and double-check your paths before running it:
sudo rsync -aAxrv --exclude junk /var/www/html/nextcloud/data/ /mnt/raid/data/Set ownership and permissions on the new location so the web server can use it:
sudo chown -R www-data:www-data /mnt/raid/data
sudo chmod -R 755 /mnt/raid/data
Then update the Nextcloud config to point at the new data directory:
sudo nano /var/www/html/nextcloud/config/config.phpChange the datadirectory value to /mnt/raid/data, then save and exit.
That’s a full Nextcloud server up and running on Debian. Once you’re logged in as an admin, Nextcloud will suggest a few settings to change for better performance and security, and I’ve covered exactly how to work through those in my guide on optimising Nextcloud.

Leave a Reply