


In this guide, we’ll install WordPress on a Debian server with Apache, going all the way from a fresh system to a working site you can log in to. Along the way we’ll bring PHP up to 8.2, set up MariaDB with a dedicated database and user, and configure an Apache virtual host to serve the site.
Step 1: Update the System
Start by making sure the system is fully up to date:
sudo apt update && sudo apt upgrade -yStep 2: Add the PHP 8.2 Repository
You can check what PHP version you currently have, if any, with:
php -vDebian’s default repositories often carry an older PHP, so we’ll pull 8.2 from the well-known Sury repository. First install the tools needed to add it, then add the repository and its signing key, and update:
sudo apt install -y lsb-release ca-certificates apt-transport-https software-properties-common gnupg2
echo "deb https://packages.sury.org/php/ $(lsb_release -sc) main" | sudo tee /etc/apt/sources.list.d/sury-php.list
sudo wget -O /etc/apt/trusted.gpg.d/php.gpg https://packages.sury.org/php/apt.gpg
sudo apt update
Step 3: Install PHP and its Extensions
If you had an older PHP installed, remove it first so the versions don’t clash:
sudo apt remove php php-common php-mysql php-gmp php-curl php-intl php-mbstring php-xmlrpc php-gd php-xml php-cli php-zip libapache2-mod-phpThen install PHP 8.2 along with the Apache module and the extensions WordPress needs:
sudo apt install php8.2 libapache2-mod-php8.2 php8.2-common php8.2-mysql php8.2-gmp php8.2-curl php8.2-intl php8.2-mbstring php8.2-xmlrpc php8.2-gd php8.2-xml php8.2-cli php8.2-zipStep 4: Tune PHP for WordPress
WordPress, and media uploads in particular, benefit from more generous PHP limits than the defaults. Open the Apache PHP config:
sudo nano /etc/php/8.2/apache2/php.iniUse Ctrl+W to search for each of the following settings and update them to these values:
max_execution_time = 300
upload_max_filesize = 100M
post_max_size = 128M
Step 5: Install MariaDB
Install the database server, then start it, enable it to run on boot, and run the hardening script:
sudo apt install -y mariadb-server mariadb-client
sudo systemctl start mariadb
sudo systemctl enable mariadb
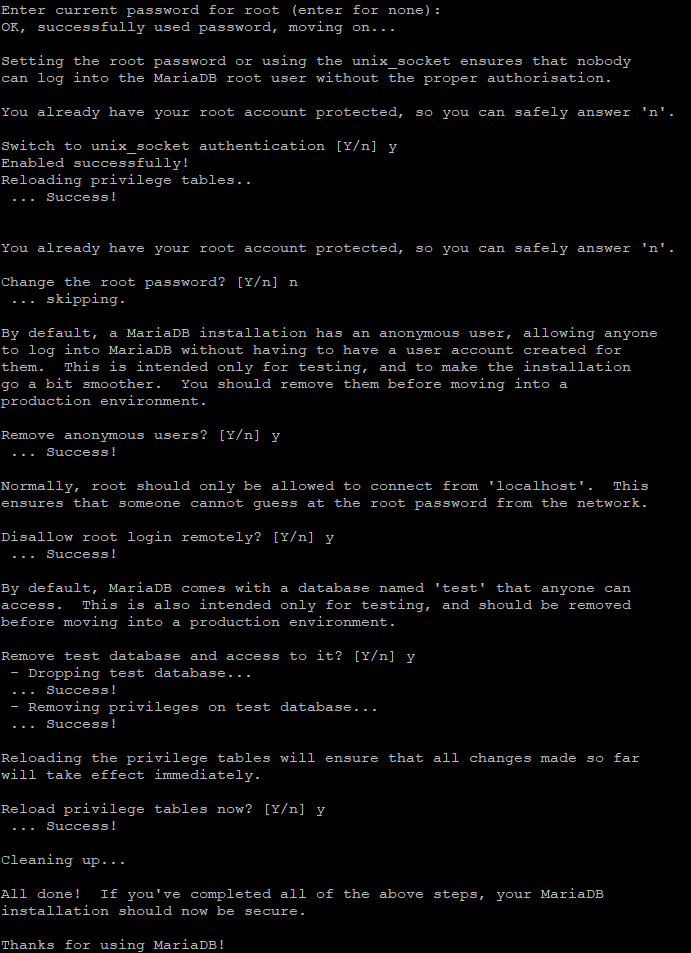
sudo mysql_secure_installation
Follow the interactive prompts to set a root password, remove the anonymous users, disallow remote root login, and drop the test database.
Step 6: Create the Database and User
Log in to MariaDB as root:
sudo mysql -u root -pThen create a database for WordPress and a dedicated user to go with it. Choose your own strong password in place of the placeholder below, since this is the account your whole site runs on:
CREATE DATABASE wordpress;
CREATE USER 'wp_user'@'localhost' IDENTIFIED BY 'ChangeThisPassword';
GRANT ALL ON wordpress.* TO 'wp_user'@'localhost' WITH GRANT OPTION;
FLUSH PRIVILEGES;
EXIT;
Step 7: Download WordPress
Move into the web root, download and extract the latest WordPress, set the ownership and permissions so Apache can manage the files, then clean up the archive:
cd /var/www/html/
sudo wget https://wordpress.org/latest.tar.gz
sudo tar -xvzf latest.tar.gz
sudo chown -R www-data:www-data /var/www/html/wordpress/
sudo chmod -R 755 /var/www/html/wordpress/
sudo rm latest.tar.gz
Step 8: Create an Apache Virtual Host
Create a virtual host config that tells Apache to serve your WordPress directory:
sudo nano /etc/apache2/sites-available/wordpress.confAdd the following, changing the ServerName, ServerAlias, ServerAdmin, and DocumentRoot to match your own domain and paths. The AllowOverride All line is important, since it’s what lets WordPress’s .htaccess handle pretty permalinks:
<VirtualHost *:80>
    ServerName yoursite.com
    ServerAlias www.yoursite.com
    ServerAdmin [email protected]
    DocumentRoot /var/www/html/wordpress

    ErrorLog ${APACHE_LOG_DIR}/wordpress_error.log
    CustomLog ${APACHE_LOG_DIR}/wordpress_access.log combined

    <Directory /var/www/html/wordpress>
        Options FollowSymlinks
        AllowOverride All
        Require all granted
    </Directory>
</VirtualHost>
Step 9: Enable the Site and Modules
Disable the default site, enable your new one, turn on the Apache modules WordPress relies on, and restart Apache:
sudo a2dissite 000-default.conf
sudo a2ensite wordpress
sudo a2enmod rewrite ssl headers
sudo systemctl restart apache2
Step 10: Finish the Install in the Browser
Open your server’s URL in a browser and work through the WordPress setup wizard, entering the database details you created earlier:
- Database Name:
wordpress - Username:
wp_user - Password: the password you set when creating the database user
- Table Prefix:
wp_
Finish by setting a site title and creating your admin account with a strong password. From then on you can log in at your site’s URL followed by /wp-admin/, and the site is ready to build on.

Leave a Reply