


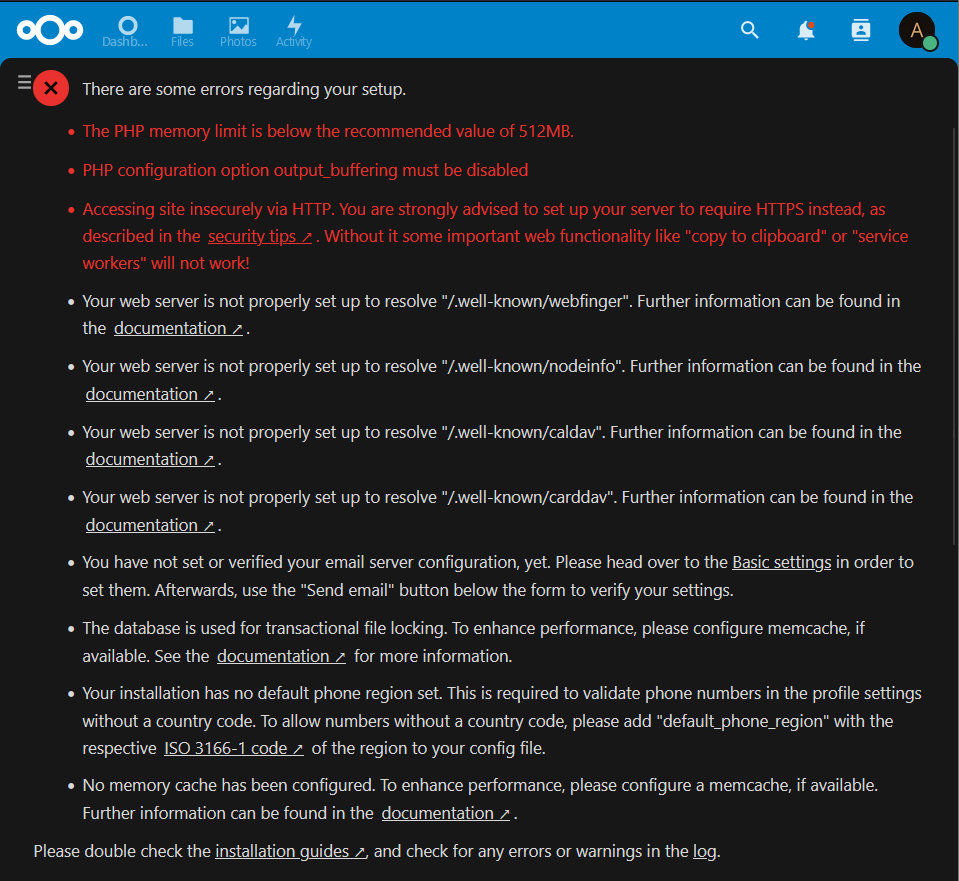
If you open your Nextcloud instance in a browser and go to the Administration Settings after a fresh install, you’ll probably notice a set of warnings and recommendations, since many of the server-side technologies aren’t optimised for Nextcloud out of the box. Any red warnings are worth dealing with, and this guide walks through the most common ones.
Raising the PHP Memory Limit to 512MB
As shown in the image above, the PHP memory limit needs raising to the recommended 512MB. Before editing anything, it helps to know exactly which php.ini file is actually being loaded, and the simplest way to find that is to create a phpinfo.php file in the root of your web directory, which may be in a different location on your system:
sudo nano /var/www/html/phpinfo.phpAdd the following, then save:
<?php
phpinfo();
Now type the IP of your web server followed by /phpinfo.php into a browser, and look for the “Loaded Configuration File” line, which tells you exactly which php.ini is in use:
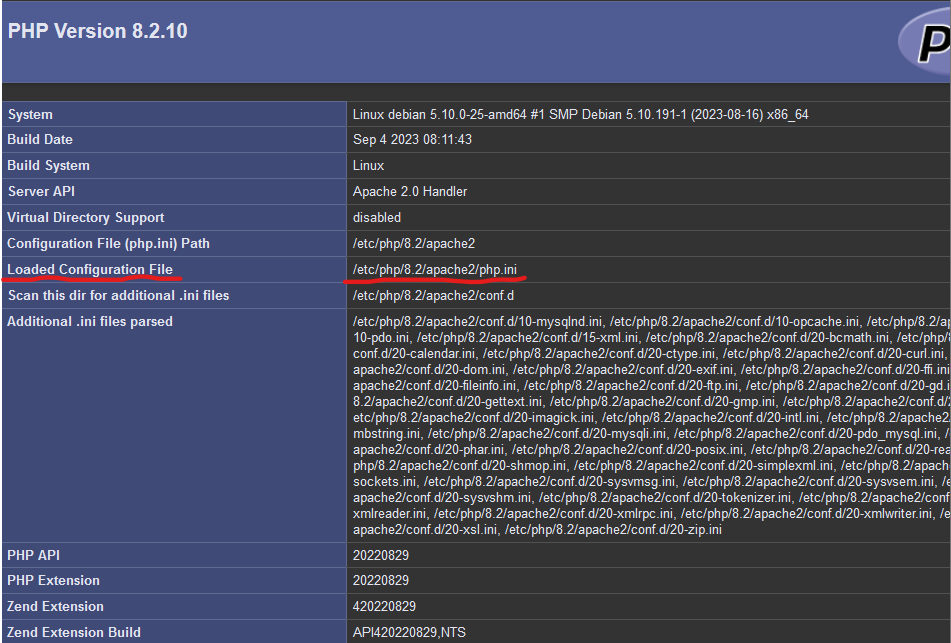
Once you’ve found the file, delete the phpinfo.php you created, since leaving it exposed is a security risk, and take a quick backup of the config before you change it so you can roll back if needed:
sudo rm /var/www/html/phpinfo.php
sudo cp /etc/php/8.2/apache2/php.ini /etc/php/8.2/apache2/php.ini.old
Then open it in nano:
sudo nano /etc/php/8.2/apache2/php.iniPress Ctrl+W to search for memory, and update the memory limit to the recommended 512MB:
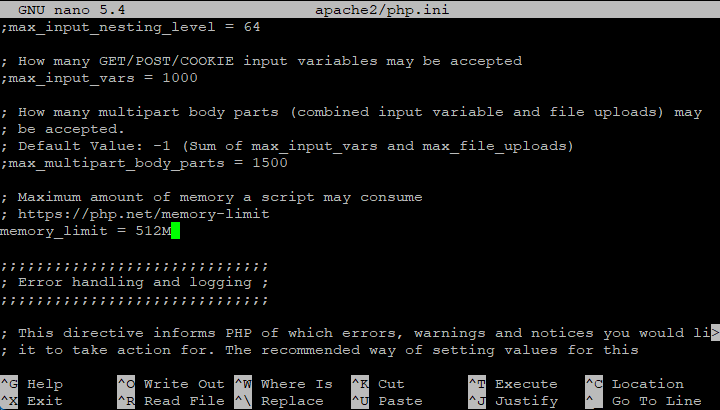
Repeat the same change in the CLI copy of php.ini, which is the one used by cron jobs:
sudo nano /etc/php/8.2/cli/php.iniThen restart Apache so the change takes effect:
sudo systemctl restart apache2Disabling output_buffering
Nextcloud also wants PHP’s output_buffering turned off. This lives in the same php.ini file you found above, so open it again:
sudo nano /etc/php/8.2/apache2/php.iniPress Ctrl+W and search for output_buffering:
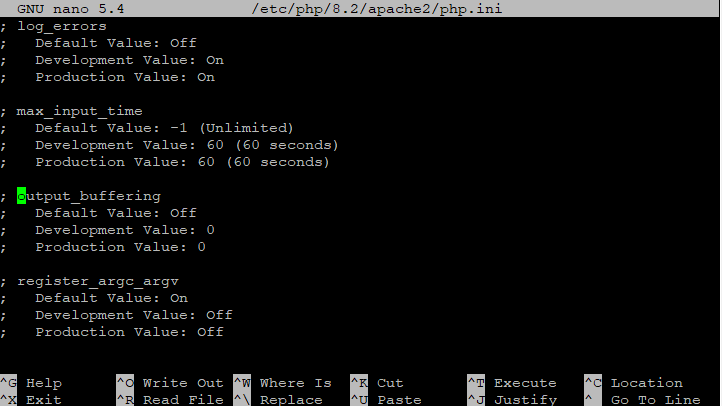
The first match is usually just a comment, so press Ctrl+W and Enter again to keep searching further down the file until you reach the actual setting:
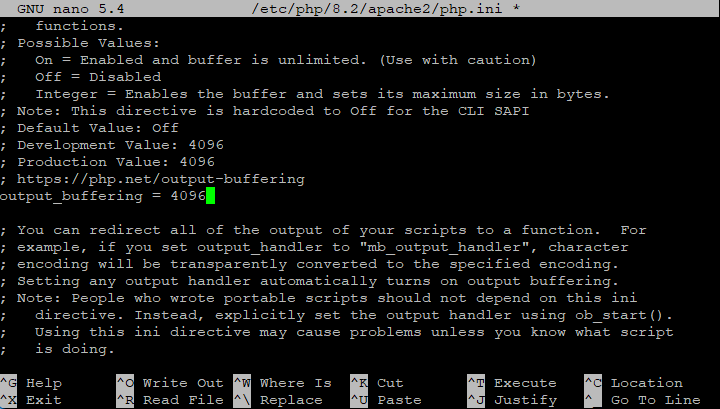
Change the value to 0, then save and exit nano with Ctrl+X, Y, Enter. As before, make the same change in the CLI file at /etc/php/8.2/cli/php.ini, matching whatever PHP version you’re on.
Fixing the “accessing site insecurely via HTTP” Warning
There are plenty of ways to put HTTPS in front of your Nextcloud server, but one of the easiest is Cloudflare, which offers a free option to secure your site with a domain name and a secure tunnel. I’ve written a full walkthrough of that in my guide here, and the best part is that it’s quick to set up.
Setting Up Cron for Background Jobs
Nextcloud recommends using cron to handle its background tasks rather than relying on the browser to trigger them. Here we’ll create a crontab for the web server user and then tell Nextcloud to use it.
First, create a crontab for the web server user, which on a Debian LAMP stack is www-data:
sudo crontab -u www-data -eIf it asks which editor to use, nano is the easier one to start with. Add the following line below the existing comments, making sure the path points at your own Nextcloud installation:
*/5 * * * * php -f /var/www/html/nextcloud/cron.php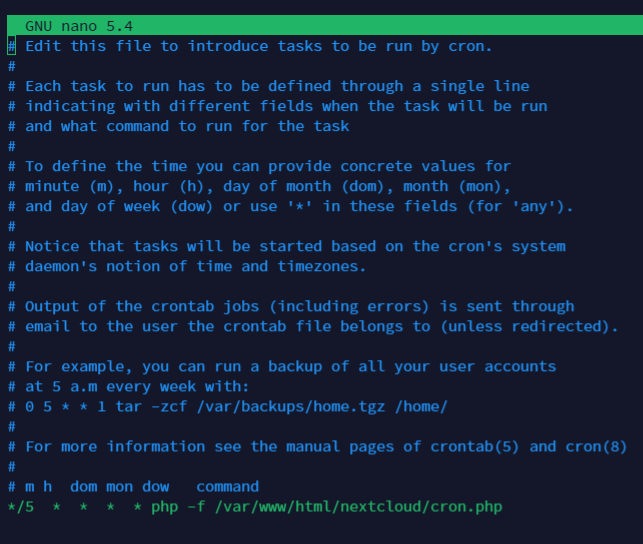
Verify the crontab was saved correctly with:
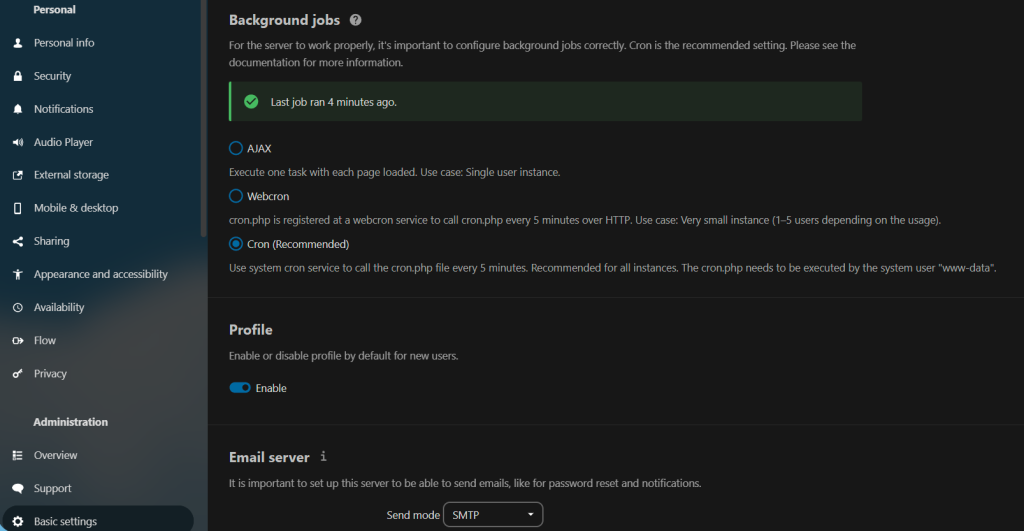
sudo crontab -u www-data -lThis should show the entry exactly as you just edited it. Finally, open your Nextcloud instance in a browser, log in with an admin account, click the icon in the top right, and go to Administration Settings, then Basic Settings on the left. Under the background jobs options, select Cron. The job runs every 5 minutes, so give it time to run at least once before troubleshooting anything.
Leave a Reply